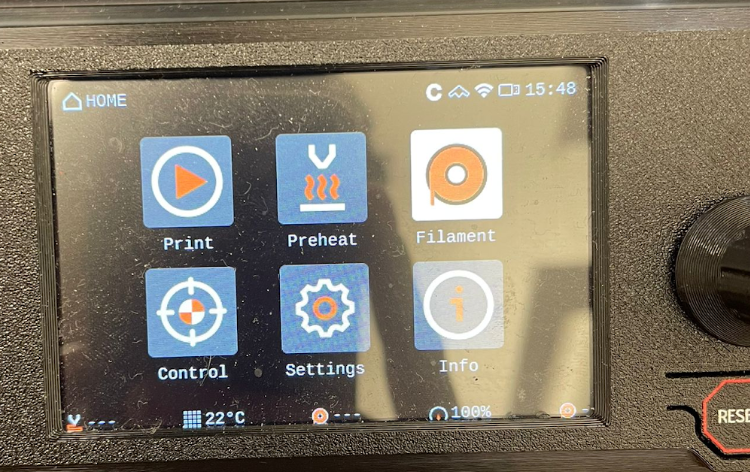
The process of loading and unloading filament on the XL multicolor printer is pretty similar to a normal process of changing filament on the other printers.
1. Go to Filament
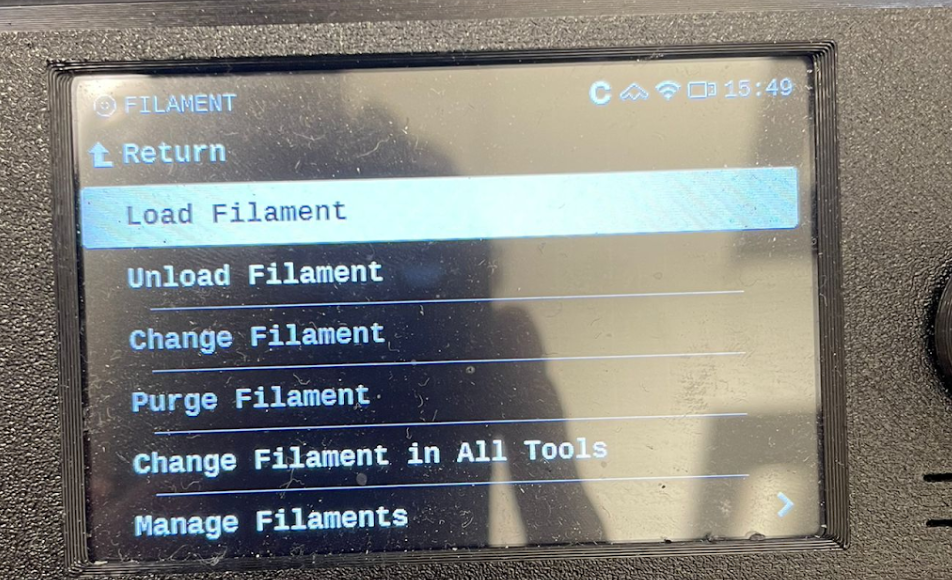
2. Select Load Filament
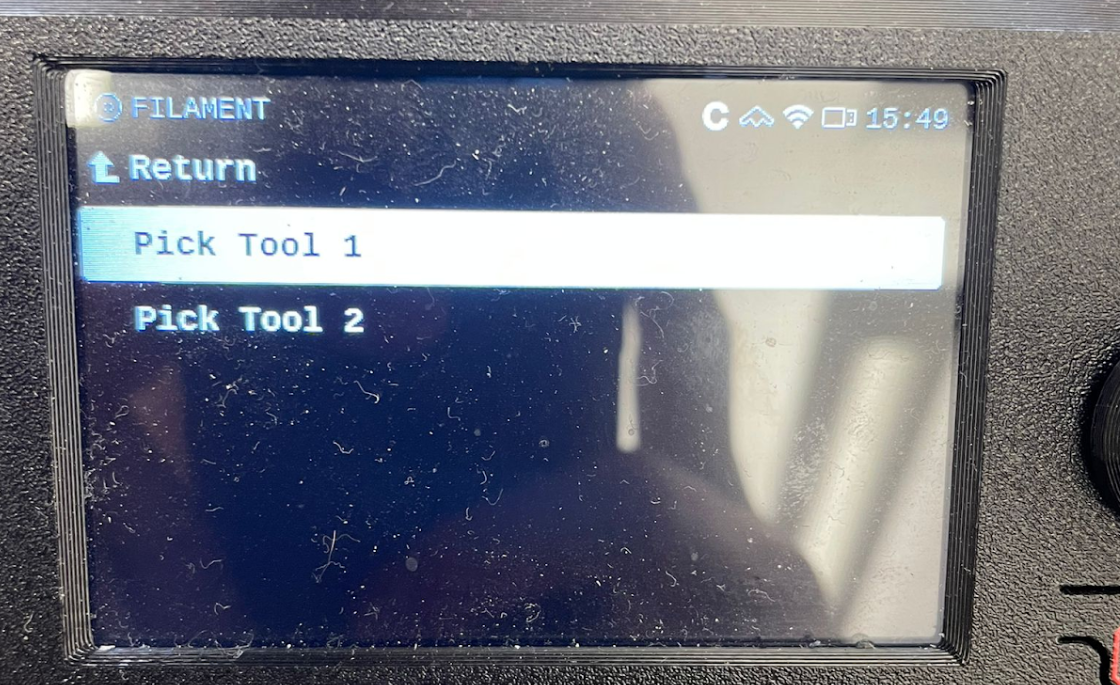
3. Choose the Tool Head
You’ll see this two options where you are going to select the nozzle that you want to put the filament into. In this case, since we only have 2 nozzles (dual extrusion) it only shows 2 tools. For extruder 1 (Tool 1) and extruder 2 (Tool 2).
4. Select Material
Once you have selected the tool that you want to load with filament you will see the material options and choose your material (PLA, PETG,etc.)

5. Where to Load the Filament
Go to the left part of the printer where you will see the following.
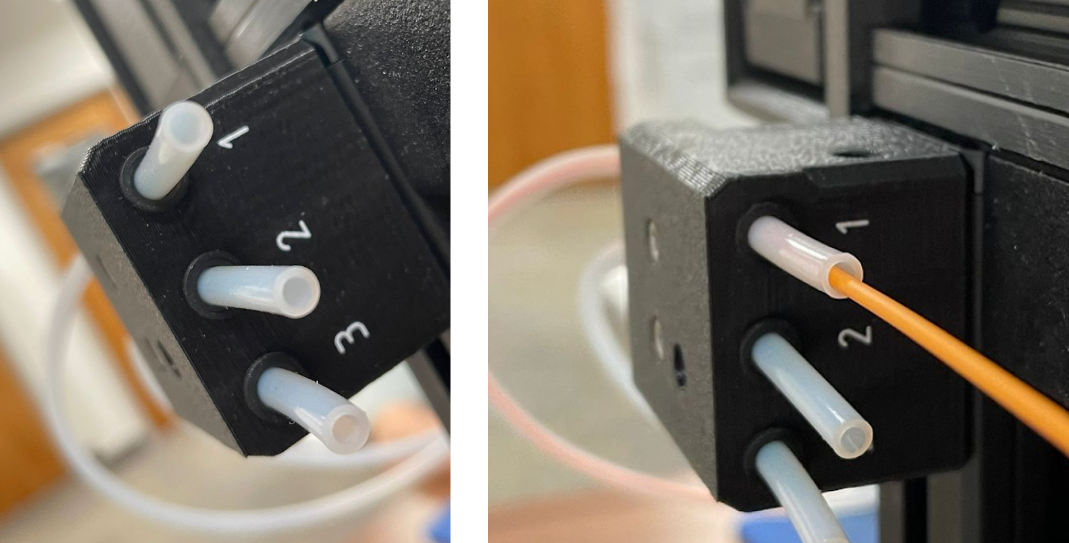
Each straw has a number next to it. Look for the one that has the number of the tool that you chose earlier. Then, insert the filament into the straw until you hear a buzz sound. Then click accept and wait until it the printer purges filament out.
6. Repeat the Process for Additional Colors
Repeat steps 2 through 5 for adding an additional color.
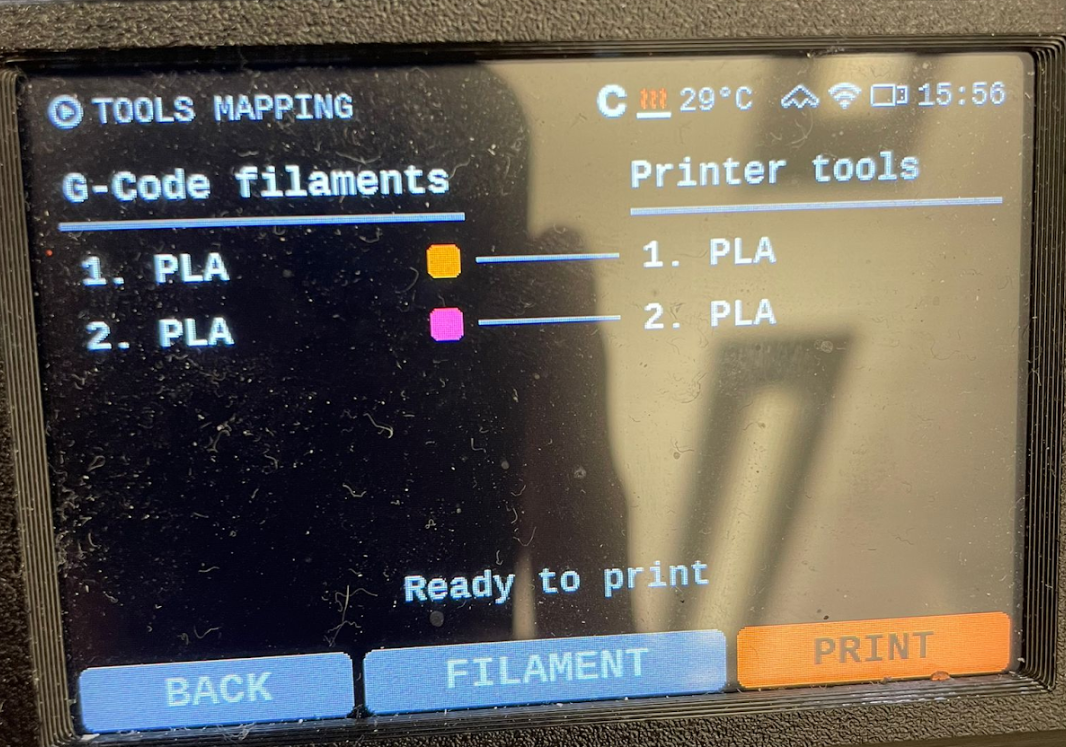
7. Starting the Print
When you go to start the actual print the Prusa software helps confirm that you loaded the filament the right by showing a small image of the colored print.
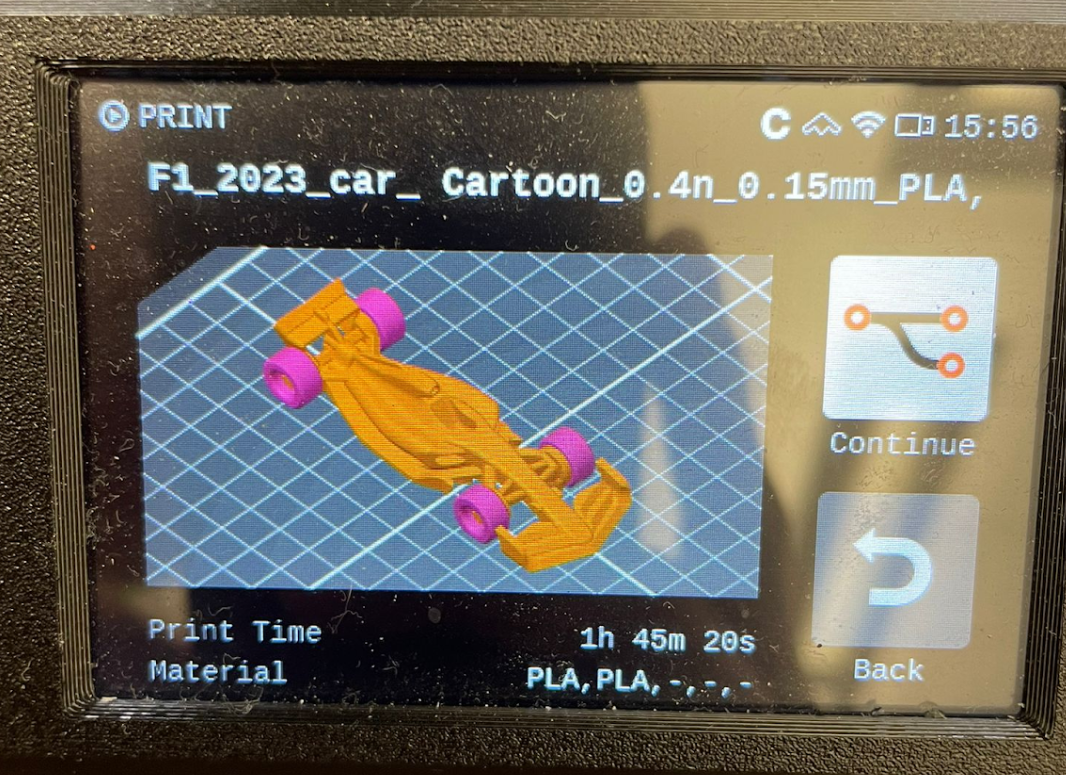
In this case the orange part is my tool 1 and the pink is tool 2.
Note: These are not the actual colors I loaded, these are reference default colors.
8. Unloading Filament
To unload the filament select Unload Filament then the tool head number, and unload like you normally would.